A default (CentOS) kernel doesn’t have TPROXY support, which is needed if you want to it to behave as a transparant proxy. This is useful if you have a cluster set-up with one or more loadbalancers, but you still want each underlying node to see the original source IP from the request.
Without transparant proxy (TPROXY), all request would appear to come from the load balancer’s IP address, instead of the actual client (which can mess up your logging, scripts, …).
This article is derived from the “How To Compile a Kernel – The CentOS way ” pages at howtoforge.com, and the guides at LoadBalancer.org .
We will assume you have a running CentOS at this point (version 5.5 or later). First up, download the kernel source. Since the TPROXY patch isn’t compatible with all Kernel versions, we’re stuck with the 2.6.25 kernel. Please browse the Kernel Source Index , and pick the latest linux-2.6.25.* kernel work from.
cd /usr/src
wget http://www.kernel.org/pub/linux/kernel/v2.6/linux-2.6.25.20.tar.gz
Now, unpack the source code, and symlink the resulting directory to ’linux’ (will make things easier later on).
tar xzf linux-2.6.25.20.tar.gz
ln -s linux-2.6.25.20 linux
Next step is to download the TPROXY patch.
wget http://www.balabit.com/downloads/files/tproxy/tproxy-kernel-2.6.25-20080519-165031-1211208631.tar.bz2
tar xjf tproxy-kernel-2.6.25-20080519-165031-1211208631.tar.bz2
Now to apply the patch mentioned.
cd linux/
cat ../tproxy-2.6.25-20080519/00* | patch -p1 --dry-run
cat ../tproxy-2.6.25-20080519/00* | patch -p1
To start compiling the kernel, we’ll first clean any leftovers that may exist.
make clean && make mrproper
And copy our current Kernel configuration to our local .config file. This will help in making sure our currently installed applications will continue working, and we don’t modify the kernel too heavily.
cp /boot/config-`uname -r` ./.config
Make sure you have all the necessary developer-tools, to compile the kernel.
yum install make rpm-build gcc gcc-c++ ncurses-devel elfutils elfutils-libs libstdc++-devel
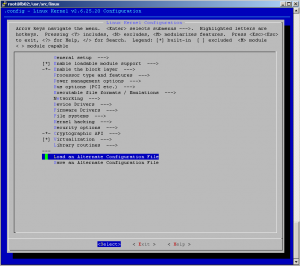
Let’s pop up the kernel configuration menu, which will allow us to easily change configs.
make menuconfig
Since we saved our currently running Kernel’s configuration in the .config file, we will choose the “Load an alternative Configuration File” option, and enter .config as the filename.
Let’s enable TPROXY support. Navigate in the menu to __
- Networking
- > Networking support
- > Networking options
- > Network packet filtering framework (Netfilter)
- > Core Netfilter Configuration
and highlight:
Transparent proxying support (EXPERIMENTAL)
Netfilter Xtables support (required for ip_tables)
Netfilter Connection tracking
> Connection tracking flow accounting
> Connection mark tracking support
"TPROXY" target support (EXPERIMENTAL)
"socket" match support (EXPERIMENTAL)
Beware that you can check these options in 2 ways:
[*]: Built-in
[M]: Module
Try to select the options listed above as [M], so they are modules.
Then hit
Once you’ve applied the above changes, exit the menu and confirm you want to save your changes.
Now start compiling the source and create the RPM install file.
make rpm
This _will_ take a long time. If you’re running this inside a virtual machine, consider adding more (virtual) CPU’s to speed up this process. It’s safe to assume this will run for at least 1 hour, probably more.
After it’s been created, you will find the resulting Source RPM file in /usr/src/redhat/SRPMS/.
lb02.lab.mojah.be linux $ ls -al /usr/src/redhat/SRPMS/
total 62124
drwxr-xr-x 2 root root     4096 Aug 21 17:31 .
drwxr-xr-x 7 root root     4096 Aug 21 16:20 ..
-rw-r--r-- 1 root root 63536285 Aug 21 17:27 kernel-2.6.25.20tproxy-1.src.rpm
And the binary RPM file in /usr/src/redhat/RPMS/i386/ (or x86_64 if you’re running 64 bit).
lb02.lab.mojah.be linux $ ls -al /usr/src/redhat/RPMS/i386/
total 120256
drwxr-xr-x 2 root root      4096 Aug 21 17:32 .
drwxr-xr-x 9 root root      4096 Aug 21 16:20 ..
-rw-r--r-- 1 root root 123002989 Aug 21 17:31 kernel-2.6.25.20tproxy-1.i386.rpm
Now it’s time to install our custom kernel.
rpm -ivh --nodeps /usr/src/redhat/RPMS/i386/kernel-2.6.25.20tproxy-1.i386.rpm
And create the ramdisk for our system.
mkinitrd /boot/initrd-2.6.25.20-tproxy.img 2.6.25.20-tproxy
Let’s see what files were made in the /boot partition. We’ll need these filenames to edit the grub config later on.
lb02.lab.mojah.be linux $ ls -alh /boot/ | grep -i tproxy
-rw-r--r--  1 root root   73K Aug 21 17:27 config-2.6.25.20-tproxy
-rw-------  1 root root  3.2M Aug 21 17:33 initrd-2.6.25.20-tproxy.img
-rw-r--r--  1 root root 1015K Aug 21 17:27 System.map-2.6.25.20-tproxy
-rw-r--r--  1 root root  1.9M Aug 21 17:27 vmlinuz-2.6.25.20-tproxy
And edit the menu-file.
vi /boot/grub/menu.lst
And add the following snippet below the “hiddenmenu” line, and right above the first kernel declaration. This consists of copying an already existing boot-item, and modify the vmlinuz and initrd locations.
title CentOS-Tproxy (2.6.25.20-tproxy)
root (hd0,0)
kernel /vmlinuz-2.6.25.20-tproxy ro root=/dev/VolGroup00/LogVol00
initrd /initrd-2.6.25.20-tproxy.img
The /vmlinuz and /initrd should point to the filenames you discovered earlier. Please don’t directly copy/paste the example above, but copy an entry from your file, and modify it (as to preserve the hard disk order and volume names).
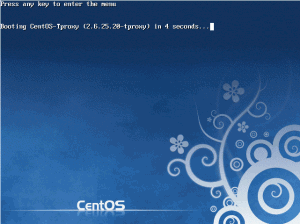
Now reboot into your newly created kernel. Your boot screen would look a bit like this now, with a notice to the newly named kernel.

You can verify this once the server’s booted up.
lb02.lab.mojah.be ~ $ uname -a
Linux lb02.lab.mojah.be 2.6.25.20-tproxy #1 SMP Sat Aug 21 17:22:41 CEST 2010 i686 i686 i386 GNU/Linux
Now we have our kernel with TPROXY support running, time to compile and patch our iptables to make use of it. To get started, download 1.4.0 iptables source. It’s import you take the 1.4.0 version, newer versions won’t work.
cd /usr/src/
wget http://www.netfilter.org/projects/iptables/files/iptables-1.4.0.tar.bz2
tar xjf iptables-1.4.0.tar.bz2
Now also download the tproxy iptables patch.
wget http://www.balabit.com/downloads/files/tproxy/tproxy-iptables-1.4.0-20080521-113954-1211362794.patch
Apply the tproxy path.
cd iptables-1.4.0/
cat ../tproxy-iptables-1.4*.patch | patch -p1
make && make install
Now you’ve installed both your kernel, and iptables, with the tproxy patch.
Troubleshooting: unknown match socket#
If you’ve done the above steps, and still get the UNKNOWN match `socket’ message in your iptables, you’ve probably skipped a kernel module required for this to work.
Troubleshooting: bad exit status during kernel compile**#
You could run into something similar to the following when compiling your kernel.
... [snip]
LD [M]  drivers/scsi/scsi_mod.o
LD      drivers/built-in.o
error: Bad exit status from /var/tmp/rpm-tmp.48540 (%build)

RPM build errors:
Bad exit status from /var/tmp/rpm-tmp.48540 (%build)
make[1]: *** [rpm] Error 1
make: *** [rpm] Error 2
That will prevent you kernel from successfully compiling. It usually means you selected a kernel option with a certain dependency that wasn’t checked. So it’s dependent on an option, that’s not being compiled.
Tricky part here is to track down which one, and I’m afraid to say I don’t know how. Also, it’s beyond the scope of this document. If you want to retry the compilation again, make sure to run:
cp .config .config_backup
make clean && make mrproper
to reset your current attempt, clear created files and reset the config back to zero. Your “broken” config can then still be found in the .config_backup file. In my experience, it’s better to just start all over …
You could also consider deleting the generated files in /usr/src/redhat/BUILD/kernel-* as they are obsolete now.
